
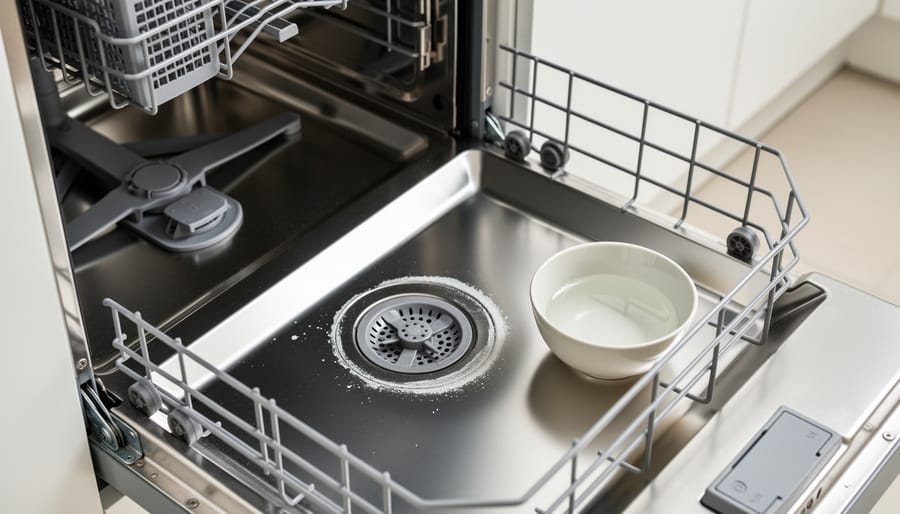
Your dishwasher can stay limescale-free and clog-proof with just three simple maintenance habits: monthly cleaning of filters and spray arms, regular salt refills, and a quarterly deep clean with descaling agents. These preventive steps take less than 30 minutes per month and will add years to your appliance’s life while keeping your dishes sparkling.
Most homeowners don’t realize their dishwasher needs regular care until white residue coats their glasses or water pools at the bottom after a cycle. Sarah, a busy parent from Manchester, discovered this the hard way when her two-year-old dishwasher started leaving gritty deposits on her children’s bottles. Her repair technician explained that limescale buildup and food debris clogs are the two biggest killers of modern dishwashers, but both are completely preventable.
Hard water is the silent culprit behind most dishwasher problems in the UK. As water heats during the wash cycle, dissolved minerals crystallize into limescale that coats heating elements, blocks spray holes, and eventually damages expensive components. Food particles compound the issue by mixing with limescale to form cement-like blockages in filters and drain pumps. The good news? A consistent maintenance routine stops these problems before they start.
This guide walks you through the exact maintenance schedule professional technicians recommend for 2026 dishwasher models, including topping up dishwasher salt correctly and cleaning the parts most prone to clogging. You’ll learn which household products work best for descaling, how to spot early warning signs of buildup, and simple weekly habits that prevent major repairs down the line.
What You’ll Need for Dishwasher Maintenance
You probably already have most of what you need in your kitchen cupboards. Effective dishwasher maintenance does not require specialized equipment or expensive products, and many homeowners find that simple, natural cleaners work just as well as commercial alternatives.
Here’s what to gather before you start your maintenance routine:
- White vinegar (at least two cups for a full descaling cycle)
- Baking soda (one cup for deodorizing and gentle scrubbing)
- Citric acid powder (alternative to vinegar for heavy limescale, about three tablespoons per cycle)
- Commercial dishwasher descaler (optional, for severe buildup in very hard water areas)
- Old toothbrush or small scrub brush (for cleaning spray arm holes and tight spaces)
- Microfiber cloths or soft sponges (for wiping seals and interior surfaces)
- Toothpick or straightened paperclip (for clearing individual spray arm holes)
- Dish soap (mild, for cleaning the filter and gasket)
- Rubber gloves (to protect hands from debris and cleaning agents)
- Flashlight or headlamp (helpful for inspecting hard-to-see areas like the drain)
White vinegar is the workhorse of dishwasher maintenance because it dissolves mineral deposits effectively and costs pennies per use. If your nose objects to the vinegar smell, citric acid powder delivers similar descaling power without the odor and rinses away cleanly. Commercial descalers work faster on stubborn buildup, but they cost more and often contain harsher chemicals.
The toothbrush and toothpick might seem trivial, but they are essential for clearing the tiny spray arm holes where limescale loves to accumulate. A flashlight makes it easier to spot hidden buildup in the drain area that you would otherwise miss. Keep these supplies together in a caddy under your sink so they are ready when maintenance day arrives.
Safety Precautions Before You Begin
Before you start any dishwasher maintenance, take a moment to protect yourself and avoid damage to your appliance. These simple precautions only take a few seconds but can prevent injuries and costly mistakes.
Turn Off the Power First
Always disconnect your dishwasher from electrical power before performing maintenance that involves accessing internal components. Locate your home’s circuit breaker panel and flip the breaker labeled for the dishwasher to the off position. If you’re only cleaning the filter or wiping down surfaces, you can leave power on, but for any work involving the drain pump, heating element, or wiring, shut off the breaker. When in doubt, err on the side of caution.
Handle Cleaning Products Safely
Wear rubber gloves when working with descaling agents, vinegar, or commercial dishwasher cleaners. These products can irritate skin, especially if you have cuts or sensitive skin. Keep the dishwasher door open while cleaning to ensure good ventilation, particularly when using citric acid or commercial descalers. Never mix cleaning products together, as combining chemicals can create harmful fumes.
Watch for Sharp Edges
Dishwasher interiors contain metal edges that can cut fingers, especially around the filter housing and spray arms. Work slowly and deliberately when removing components, and keep a towel nearby to wipe away water that might make surfaces slippery. If you drop a screw or small part inside the dishwasher, use a flashlight and retrieval tool rather than reaching blindly into tight spaces.
Understanding Limescale and Clog Formation
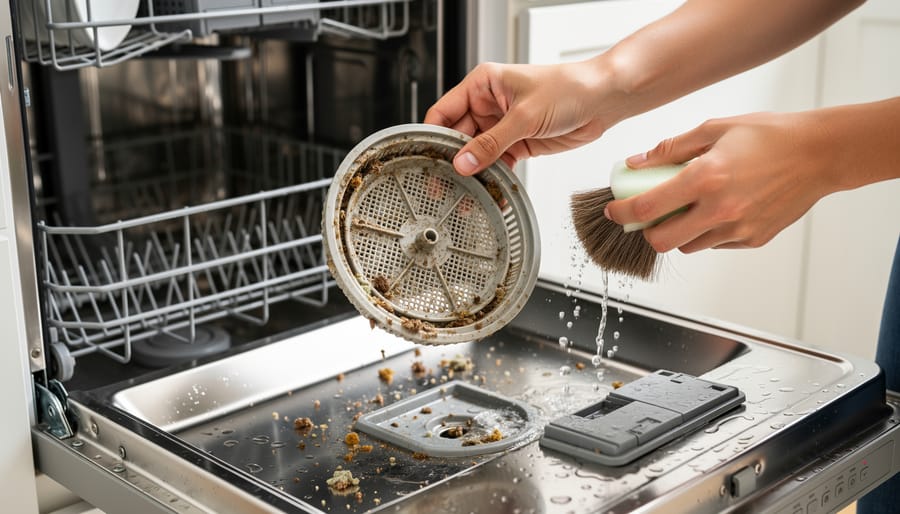
Limescale forms when hard water, water containing high levels of dissolved minerals like calcium and magnesium, heats up inside your dishwasher. As the water evaporates during the wash and dry cycles, these minerals crystallize and stick to surfaces. Over time, these white, chalky deposits accumulate on heating elements, spray arms, and interior walls. The harder your water, the faster this buildup occurs.
Clogs develop through a different but equally problematic process. Food particles that slip past the filter combine with grease, soap residue, and yes, limescale to form stubborn blockages. The most vulnerable spots are the filter assembly, drain pump, spray arm holes, and the connection hose between your dishwasher and household plumbing. What starts as a small restriction gradually worsens until water can’t drain properly or spray arms stop spinning.
Sarah from Manchester learned this the hard way. Her dishes started coming out cloudy, then stopped getting clean altogether. “I assumed I needed a new dishwasher,” she told us. When a plumber finally investigated, he discovered the spray arm holes were nearly sealed shut with limescale, and the filter was packed solid with a greasy, mineral-laden sludge. The repair cost more than a year’s worth of descaling products would have.
The reality is that limescale and clogs feed each other. Mineral deposits narrow passages, creating areas where food and grease catch more easily. Those organic materials then trap more minerals. It’s a cycle that accelerates over time, which is precisely why prevention beats repair. A dishwasher struggling with buildup works harder, uses more energy, and wears out components faster. Regular maintenance breaks this cycle before it starts, keeping everything flowing freely and your dishes sparkling clean.

Step-by-Step Preventive Maintenance Process
Monthly Filter Cleaning Routine
The filter is your dishwasher’s first line of defense against clogs, trapping food particles before they reach the drain pump. Most filters sit at the bottom of the tub, beneath the lower spray arm. You’ll typically find a cylindrical or flat mesh assembly that twists or lifts out.
Start by removing the lower dish rack for easier access. Twist the filter counterclockwise (some models have a release tab you press first) and lift it straight up. You might find two parts: a fine mesh screen and a coarser outer cylinder. Separate them if they come apart.
Rinse both pieces under warm running water, using a soft brush or old toothbrush to dislodge trapped particles. Pay special attention to the mesh, where grease and tiny food bits accumulate. For stubborn debris or limescale deposits, soak the filter in warm water with a tablespoon of baking soda for 10 minutes, then scrub gently.
Check the filter housing in the dishwasher base while the filter is out. Wipe away any visible debris or standing water with a damp cloth. This area often collects overlooked gunk that eventually causes odors and drainage problems.
Reassemble the filter components if you separated them, align the filter with its housing, and twist clockwise until it locks into place. Give it a gentle tug to confirm it’s secure. A loose filter lets food particles bypass the trap entirely, defeating the whole purpose of this monthly routine.
Spray Arm Inspection and Cleaning
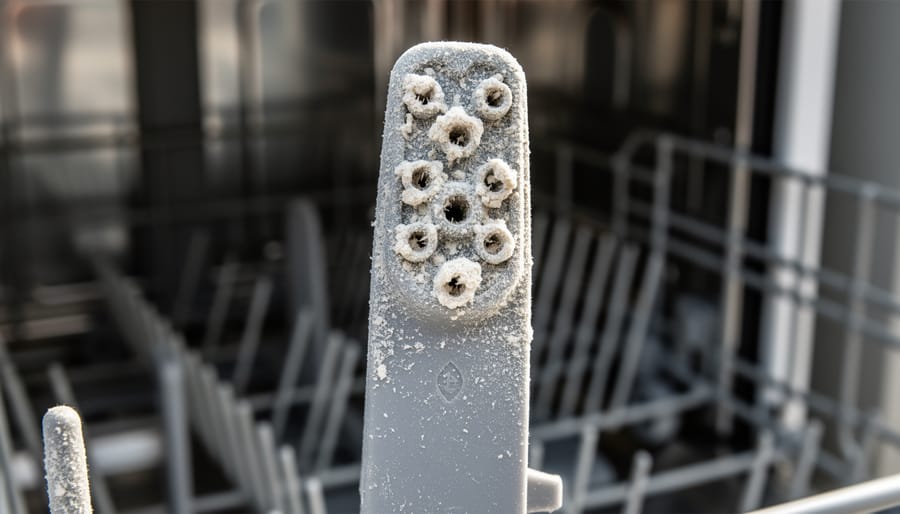
Start by removing the dish racks so you can access both spray arms, most dishwashers have one at the bottom and one mid-level or top. The lower spray arm typically twists counterclockwise or lifts straight up after unscrewing a center cap. Check your manual if it’s not immediately obvious, but most designs are intuitive once you try.
Hold the spray arm up to a light source and look through each hole. You’ll often see white mineral deposits or dark food particles blocking some openings. Even partial blockages reduce water pressure and create uneven cleaning patterns.
For cleaning, use a straightened paperclip, toothpick, or small wire to gently poke through each hole from the outside. Work carefully, you want to dislodge debris without enlarging the holes or damaging the plastic. Stubborn limescale responds well to soaking the arm in a bowl of white vinegar for 30 minutes before clearing the holes.
Rinse the spray arm under running water while spinning it to flush out loosened particles. Shake it vigorously to clear internal passages where debris collects. Before reinstalling, run your finger along the interior to check for remaining buildup.
Spin the spray arm by hand after reinstalling to confirm it rotates freely without wobbling or catching. A properly seated, clean spray arm should move smoothly with minimal effort. This simple check every month or two keeps water flowing where it needs to go.
Door Seal and Gasket Maintenance
The rubber seal around your dishwasher door traps moisture, food particles, and soap residue, creating the perfect environment for mold and mildew. Regular cleaning prevents these problems and catches early signs of wear that can lead to water leaks.
Start by opening the door and pulling back the rubber gasket gently to expose the hidden folds where grime accumulates. Wipe the entire seal with a damp cloth dipped in warm, soapy water or a mixture of equal parts water and white vinegar. Pay special attention to the bottom section where water pools after each cycle.
For stubborn mold spots, make a paste with baking soda and water, apply it to the affected areas, let it sit for five minutes, then scrub with an old toothbrush. Rinse thoroughly with a clean, damp cloth.
While cleaning, inspect the gasket for cracks, tears, or areas that feel brittle. Run your finger along the entire seal to check for leaks or damaged sections that might compromise the door’s watertight seal. If you spot significant damage, the gasket will need replacement to prevent water escaping during wash cycles and causing drainage problems or floor damage.
Descaling the Interior
Limescale accumulates on the walls, heating element, and hidden components of your dishwasher over time, reducing efficiency and leaving spots on your dishes. How often you descale depends on your water hardness, monthly if you have very hard water, every three months for moderately hard water, and twice yearly if your water is soft.
Vinegar Method: Pour two cups of white vinegar into a dishwasher-safe bowl and place it on the top rack. Run a hot water cycle without any dishes or detergent. The acidic vinegar dissolves mineral deposits throughout the interior. This works well for light to moderate buildup and costs pennies per treatment.
Citric Acid Method: For heavier limescale, citric acid is more powerful than vinegar. Sprinkle three to four tablespoons of citric acid powder directly onto the bottom of the empty dishwasher. Run a hot cycle. Citric acid tackles stubborn deposits without the vinegar smell, and it’s gentle on dishwasher components.
Commercial Descalers: Products specifically designed for dishwashers offer the strongest descaling action and often include additional cleaning agents. Follow the package directions carefully, most require you to add the product and run a specific cycle type. These work best when limescale has already caused noticeable performance issues.
After descaling, wipe down visible surfaces with a damp cloth to remove any loosened deposits. Check the heating element area at the bottom where limescale tends to concentrate.
Drain and Hose Check
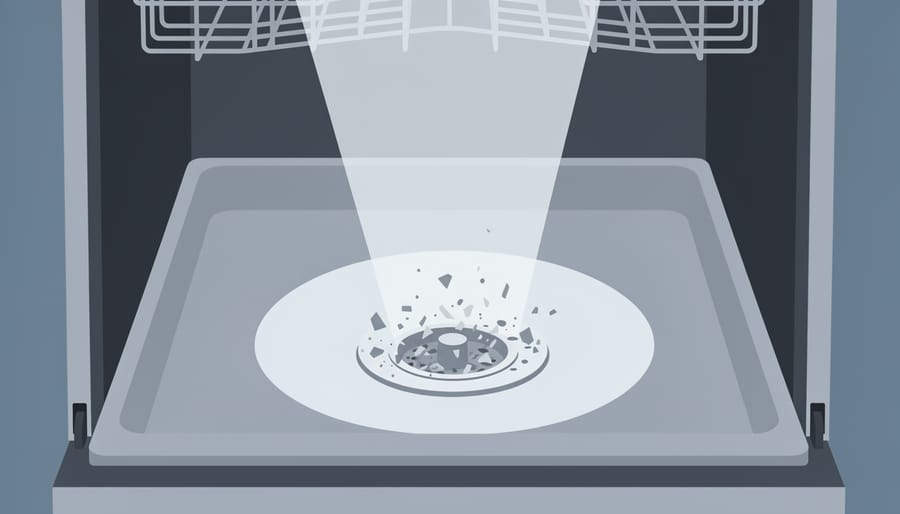
Start by unplugging your dishwasher or switching off its circuit breaker. Pull out the bottom rack to access the drain area at the base of the tub. You’ll see a round or square drain cover, twist or lift it off and set it aside. Beneath it, there’s usually a cylindrical drain basket or sump filter that catches debris the main filter missed.
Lift out this basket and rinse away any sludge, food scraps, or limescale fragments you find. Check the drain hole itself: shine a flashlight down and use a long bottle brush or cloth-wrapped finger to wipe the walls clean. Sometimes a paper label, broken glass, or hardened grease sits just below the opening, blocking water flow.
Next, locate the drain hose where it connects under the sink or at the garbage disposal. Squeeze it gently along its length, hard lumps mean buildup inside. If you suspect a blockage, disconnect the hose from both ends, hold it over a bucket, and flush it with hot water mixed with a cup of white vinegar. You can also use a plumber’s snake or straightened wire hanger to push stubborn clogs through.
Reconnect everything, replace the drain cover, and run a short rinse cycle to confirm water drains completely.
Verifying Your Maintenance Was Successful
After completing your maintenance routine, run an empty cycle with a cup of white vinegar on the top rack to flush the system and verify everything’s working properly. Listen for smooth water flow and watch for any unusual noises that might indicate remaining blockages.
Open the door mid-cycle (if your model allows) or immediately after the cycle ends to check that spray arms are spinning freely and water is reaching all corners. You should see clear water draining completely from the bottom, with no pools or slow drainage. If water lingers in the filter area more than a few seconds after the cycle, something may still be blocking the drain path.
Your next few regular loads will tell you if you’ve succeeded. Clean dishes, no residue or spots, and no funky smells are all good signs. If glasses come out cloudy despite your descaling efforts, your water might be harder than typical maintenance can handle, and you’ll want to consider a water softener or rinse aid specifically designed for hard water conditions.
Watch for these red flags: dishes still coming out dirty, grinding sounds during cycles, or error codes appearing on the display. These suggest a deeper issue beyond routine maintenance. Standing water after a complete cycle means the clog wasn’t fully cleared, and you’ll need to recheck the filter, drain hose, and garbage disposal connection if applicable.
If problems continue after two maintenance attempts, you’re likely dealing with a mechanical failure or severe buildup requiring professional attention.
Ongoing Prevention Habits
The best maintenance plan is one you actually follow. Instead of waiting for problems to appear, build these simple habits into your routine and you’ll prevent most limescale and clog issues before they start.
After each dishwasher cycle, take a quick look at the bottom of the tub. If you spot food particles, wipe them out with a damp cloth. It takes ten seconds and saves you from scrubbing hardened debris later. Run hot water at your sink before starting the dishwasher so it begins with hot water immediately, which dissolves grease and prevents buildup more effectively than a cold start.
Load dishes strategically. Scrape off large food scraps but skip the pre-rinse under the tap, which actually reduces your detergent’s effectiveness. Arrange items so water can reach all surfaces and nothing blocks the spray arms. Bowls and cups should face downward, and avoid nesting items inside each other.
Keep your rinse aid dispenser filled. Many people skip this step, but rinse aid does more than prevent water spots. It helps water sheet off dishes and drain more completely, reducing the moisture that contributes to limescale formation. If you have hard water, this becomes even more important.
Here’s a simple prevention schedule to follow:
- Daily: Wipe the door seal and remove any visible food from the tub bottom
- Weekly: Run an empty hot cycle with a cup of white vinegar in the top rack
- Monthly: Clean the filter thoroughly and inspect spray arm holes
- Quarterly: Perform a full descaling treatment based on your water hardness
For homes with hard water, consider addressing the root cause. You might choose a water softener for your whole house, which benefits all your appliances and fixtures. Rural homeowners often benefit from well water filtration systems that tackle minerals before they reach your plumbing. If you’re already dealing with persistent clogs elsewhere, our guides to drain and clog fixes can help you tackle those issues too.
Use quality detergent designed for your water type. Hard water areas need detergents with built-in water softeners, while soft water areas need less detergent overall. Too much detergent leaves residue that attracts more buildup.
When to Call a Professional Plumber
Sometimes regular maintenance just isn’t enough to tackle the root cause of your dishwasher problems. If you’ve been diligent about monthly cleaning but still notice standing water after cycles, persistent limescale despite descaling efforts, or strange grinding noises during operation, it’s time to bring in a professional.
Recurring clogs that return within days of clearing often signal deeper drainage issues that extend beyond your dishwasher. A plumber can inspect the connection to your home’s main drain line, check for improper installation angles that prevent water from flowing out properly, and identify blockages in pipes you can’t reach. They’ve got specialized cameras and tools that reveal what’s happening inside those hidden sections.
Hard water problems that won’t quit despite your best efforts might require a whole-home water softener system, something a plumber can install and calibrate for your specific water hardness level. If you’re replacing filters and descaling constantly yet still battling crusty buildup, this system-wide approach makes more sense than fighting the same battle repeatedly.
Watch for leaks around the base of your dishwasher, error codes that won’t clear, or complete drainage failure. These situations need professional diagnosis because they often involve faulty pumps, damaged hoses, or electrical components that aren’t safe for DIY repairs.
Don’t feel like you’ve failed if you need help. Professional plumbers solve problems that genuinely require expertise and equipment most homeowners don’t have. They’ll get your dishwasher back to peak performance and often prevent bigger headaches down the road.
Frequently Asked Questions
How often should I clean my dishwasher filter?
Clean your filter monthly if you run the dishwasher daily, or every two to three months if you use it less frequently. Homes with hard water or heavy cooking may benefit from weekly filter checks to catch debris before it becomes a problem.
Can I use vinegar to descale my dishwasher regularly?
Yes, running a vinegar cycle monthly is safe for most dishwashers and effectively dissolves limescale buildup. Place a cup of white vinegar on the top rack and run a hot, empty cycle, though check your manual first since some manufacturers recommend against acidic cleaners for certain seal materials.
Will a water softener eliminate the need for dishwasher maintenance?
A water softener dramatically reduces limescale formation but doesn’t eliminate maintenance needs entirely. You’ll still need to clean filters for food debris and check spray arms periodically, though descaling frequency can drop from monthly to every few months depending on your softener’s effectiveness.
What’s the difference between rinse aid and dishwasher salt?
Rinse aid helps water sheet off dishes to prevent spots, while dishwasher salt (used in European models with built-in softeners) regenerates the machine’s internal water-softening system. Many North American dishwashers don’t have salt compartments, so check your manual before purchasing salt products.
Are commercial descalers better than natural solutions?
Commercial descalers work faster and may tackle severe buildup more aggressively, but vinegar and citric acid handle routine maintenance just as effectively at a lower cost. The choice comes down to the severity of your limescale problem and personal preference for natural versus chemical cleaners.
My dishwasher is under warranty. Will DIY maintenance void it?
Standard maintenance like filter cleaning and vinegar rinses won’t void warranties since manufacturers expect owners to perform routine care. However, disassembling components beyond user-accessible parts or using unapproved harsh chemicals might create issues, so review your warranty terms and stick to the maintenance procedures outlined in your manual.
These questions reflect the real concerns homeowners bring to their dishwasher maintenance routines. You’ll notice patterns in what confuses people most: the difference between prevention products, how water quality affects maintenance needs, and whether they’re doing too much or too little. Trust your judgment on these practices. If a method works consistently for your household and doesn’t damage your machine, you’re on the right track regardless of conflicting advice you might find online.
Taking care of your dishwasher doesn’t require professional expertise or hours of your time. A few simple habits, cleaning the filter monthly, checking spray arms, and running occasional descaling cycles, make all the difference between a machine that lasts fifteen years and one that needs replacing after five.
The beauty of preventive maintenance is that it’s far easier than dealing with breakdowns. Spending twenty minutes a month on these tasks beats waiting for a repair technician and paying hundreds of dollars to fix limescale damage or clogged pumps. You’re already investing in your home’s other systems; your dishwasher deserves the same attention.
Start small if the full routine feels overwhelming. Pick one habit this week, maybe cleaning the filter, and build from there. Once you see how much better your dishes come out and how smoothly the machine runs, you’ll naturally want to keep up the momentum.
Every home has different water conditions and usage patterns, so your experience might reveal maintenance tricks that work especially well for your situation. We’d love to hear what’s worked for you. Share your dishwasher maintenance tips and stories on our site, your insight could help another homeowner avoid a costly repair or finally solve that persistent cloudy glass problem. After all, the best advice often comes from people who’ve been there themselves.