
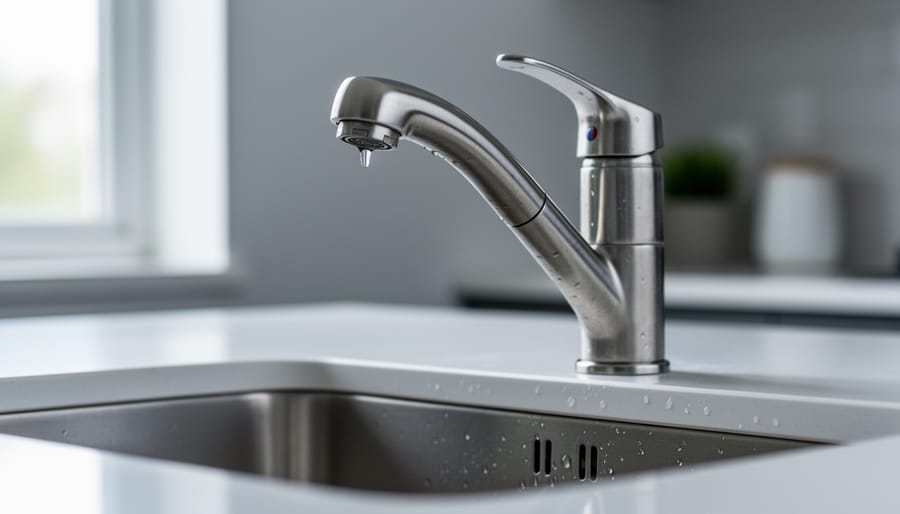
Most kitchen faucet problems come down to worn-out cartridges or O-rings, and you can replace either one in about 20 minutes with basic tools you probably already own. Nine times out of ten, that drip, leak, or weak stream you’re dealing with traces back to these small rubber and plastic parts inside your faucet that naturally wear out from daily use.
Here’s your quickest diagnostic: Turn the water off under your sink, then turn the faucet handle. If water still drips from the spout, you’ve got a cartridge issue. If you spot water pooling around the base of the faucet or under the sink, you’re looking at O-ring or seal failure. Both fixes follow the same basic pattern: shut off the water supply, disassemble the faucet handle, swap the worn part, and reassemble.
Before you start, grab a bucket and some old towels. You’ll be working with water that’s trapped in the lines, and a little preparation saves a lot of cleanup. Most repairs need just an adjustable wrench, a screwdriver, and replacement parts from any hardware store. Bring your old cartridge or O-ring with you to match the size, since faucets vary by manufacturer.
If your faucet is corroded to the point where parts won’t budge, or if you’re dealing with a wall-mounted commercial-style faucet, that’s when it makes sense to call in a professional. But for standard kitchen faucets installed since the early 2000s, this is one of the most beginner-friendly plumbing repairs you can tackle. Sarah from Ohio told us she fixed hers during a lunch break and wondered why she’d listened to that drip for six months.
What’s Wrong With Your Kitchen Faucet? Common Symptoms Explained
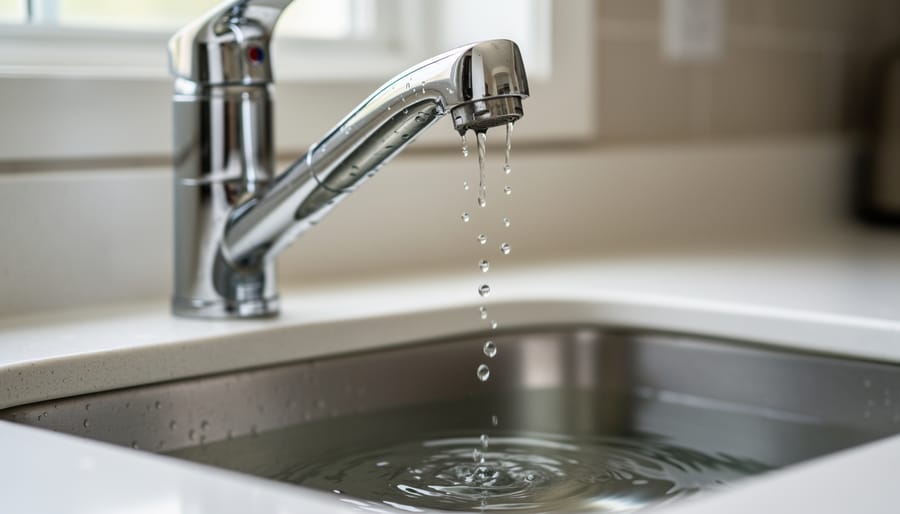
The first step in fixing your kitchen faucet is figuring out exactly what’s going wrong. You might be noticing more than one issue, which is actually common since faucet problems tend to create a domino effect. Let’s walk through what each symptom looks and sounds like so you can accurately diagnose your situation.
- Dripping from the spout: Water continues to drip even when the handle is fully turned off, creating that annoying plink-plink sound and wasting water with every drop.
- Leaking around the base: Puddles or moisture appear on the counter around where the faucet meets the sink, often only noticed when the faucet is running.
- Low water pressure: The water comes out as a weak trickle instead of a strong stream, or the flow sputters and sprays unevenly.
- Squealing or screeching noises: High-pitched sounds occur when you turn the water on or off, sometimes varying with how far you open the handle.
- Loose or wobbly handle: The handle moves excessively or feels unstable when you operate it, requiring more rotation than usual to turn water on or off.
- Sprayer not working: The side sprayer has weak pressure, won’t switch from faucet to sprayer mode, or water leaks from the hose connections under the sink.
- Temperature control problems: You can’t get the water temperature you want, it fluctuates unexpectedly, or one temperature barely works while the other runs fine.
Take a moment to observe your faucet carefully while it’s both on and off. Does the dripping happen immediately when you turn off the water, or does it continue for several seconds and then stop? Can you see where the leak is actually coming from, or is water just appearing mysteriously on your counter? The more specific you can be about your symptoms, the easier it will be to identify the underlying cause and make the right repair.
Some symptoms point to simple fixes you can complete in minutes, while others indicate worn internal parts that need replacement. Don’t worry if you’re seeing multiple symptoms at once. That often means a single worn component is causing several related problems, and one repair can solve everything. The next section will help you understand why these issues develop in the first place.
Why Kitchen Faucets Fail: Understanding the Root Causes
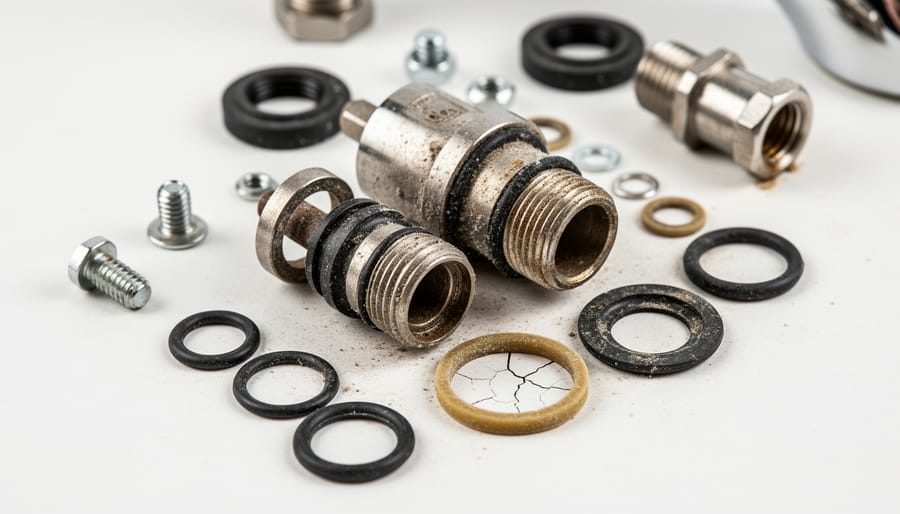
Your kitchen faucet might look like a simple fixture, but it’s actually a precision assembly with multiple moving parts working together every time you turn it on. Understanding what’s inside and why these components wear out helps you diagnose problems faster and avoid repeating the same issues.
Most kitchen faucets fail because of wear and tear on small but crucial internal parts. Every time you turn the handle, you’re engaging seals, cartridges, and valves that control water flow and prevent leaks. These components work under constant water pressure, so even high-quality faucets eventually develop problems. The good news is that most failures follow predictable patterns based on how faucets are designed.
Here’s what’s actually happening inside your faucet and why it matters:
- O-rings
- Small rubber rings that create watertight seals around moving parts. When they dry out or crack, you get leaks at the base or around the handle.
- Cartridge
- The valve mechanism that controls water flow and temperature in modern faucets. A worn cartridge causes dripping, difficulty adjusting temperature, or handles that won’t turn smoothly.
- Valve seat
- The connection point between the faucet and spout where water passes through. Corrosion here creates leaks from the spout even when the faucet is off.
- Aerator
- The screen at the tip of your spout that mixes air with water for a steady stream. Mineral deposits clog this mesh and reduce water pressure.
- Ceramic disc
- Two polished ceramic plates that slide against each other to control water in high-end faucets. Though durable, sediment can scratch these discs and cause leaks.
The most common culprit behind faucet failures is mineral buildup from hard water. Those white, crusty deposits you see around your faucet base aren’t just cosmetic. Calcium and magnesium in your water accumulate inside the aerator, around valve seats, and on moving parts, causing them to stick, corrode, or wear out faster. If you notice white or greenish buildup anywhere on your faucet, mineral deposits are likely affecting internal components too. This is particularly common in areas with hard water, and it’s worth investigating whether you should choose a water softener to protect all your plumbing fixtures.
Loose connections under the sink cause another category of problems. The supply lines that bring water to your faucet can work loose from vibration and repeated use, creating leaks you might not notice until water damage appears. Similarly, the mounting nuts that hold the faucet to the sink can loosen over time, allowing the whole fixture to wobble and stress the seals.
Worn sprayer hoses fail differently than the main faucet body. The flexible hose connecting your pull-down or side sprayer gets flexed hundreds of times, eventually developing cracks or separating at the connections. The diverter valve that switches water between spout and sprayer can also stick or wear out, leaving you with weak spray pressure or water coming out both places at once.
How to Fix Your Kitchen Faucet: Step-by-Step Repairs
Before You Start: Tools and Preparation
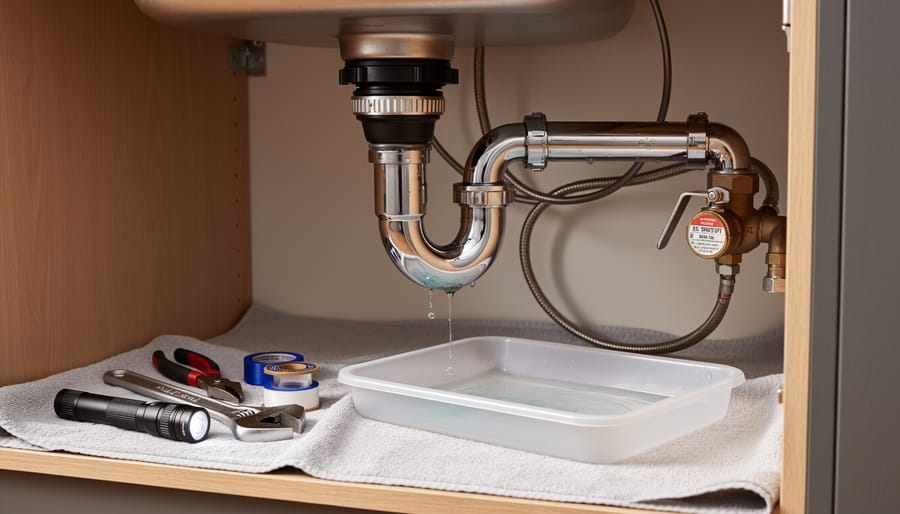
Most kitchen faucet repairs only need a few basic tools you probably already own. Grab an adjustable wrench, a set of screwdrivers (both Phillips and flathead), and Allen wrenches in various sizes since many modern faucet handles use hex screws. You’ll also want a small container to hold screws and parts, some old towels or rags, and a flashlight for seeing under the sink. Pick up plumber’s grease at any hardware store, it’s inexpensive and makes reassembly much smoother.
Before you touch anything, turn off the water supply. Look under your sink for two shut-off valves, one for hot and one for cold. Turn them clockwise until they stop.
Once the water’s off, turn on the faucet to drain any remaining water in the lines and relieve pressure. Lay a towel in the sink to catch dropped screws and protect the basin from scratches. Clear out the cabinet under your sink so you have room to work. Taking five minutes to prepare properly will save you headaches later.
Fixing a Dripping Spout
A dripping spout is usually caused by a worn internal component, and the fix depends on your faucet type. Compression faucets use rubber washers, while cartridge and ceramic disc faucets have replaceable cartridges or disc assemblies. Once you’ve shut off the water supply and covered your drain to catch dropped parts, you’re ready to start.
Look for a small screw on top or behind the handle. Decorative caps or buttons often hide these screws. Pop the cap with a flathead screwdriver, then remove the screw with a Phillips head or Allen wrench. Lift the handle straight up. If it sticks, gently wiggle it while pulling.
- Remove the decorative cap and handle screw, then lift off the handle.
- Unscrew the packing nut with an adjustable wrench to expose the valve stem or cartridge.
- For compression faucets, lift out the stem and replace the rubber washer at the bottom, securing it with the brass screw.
- For cartridge faucets, pull straight up on the cartridge using pliers if needed, noting its orientation before removing.
- Install the new cartridge in the exact same position, or replace O-rings on the old one if the cartridge itself is fine.
- Reassemble all components in reverse order, hand-tightening first before using your wrench.
- Turn the water supply back on slowly and test for leaks.
Take a photo before you start disassembly. This gives you a reference when putting everything back together. If you’re replacing a cartridge, bring the old one to the hardware store to ensure you get an exact match. Faucet manufacturers use proprietary designs, so generic replacements rarely work.
Stopping Base Leaks
Water pooling around your faucet base usually means either loose connections or failed O-rings where the faucet meets the sink. Start by checking what you can see: use your wrench to carefully tighten the mounting nut that holds the faucet to the countertop. Don’t overtighten, snug is enough.
If tightening doesn’t stop the leak, you’ll need to replace the base O-rings. First, clear everything from under your sink so you can work comfortably. Look up at the faucet assembly, you’ll see supply lines and the mounting hardware. Disconnect the supply lines (have a bucket ready for residual water), then loosen the mounting nuts completely. Lift the faucet straight up and out.
Turn it over and you’ll find rubber O-rings sitting in grooves around the base. If they’re cracked, flattened, or brittle, that’s your culprit. Pry out the old rings with a flathead screwdriver, clean the grooves thoroughly, then roll new O-rings of the same size into place. Coat them lightly with plumber’s grease before reinstalling the faucet.
Restoring Water Pressure
Low water pressure frustrates you when you’re trying to fill pots or rinse dishes, but it’s usually an easy fix. Nine times out of ten, the culprit is a clogged aerator, that little screen at the tip of your spout.
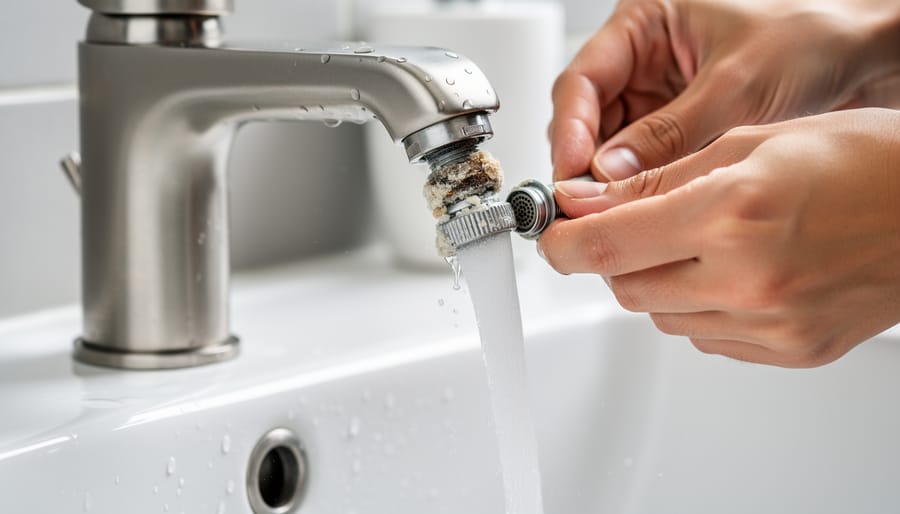
Start by unscrewing the aerator. Most twist off by hand, turning counterclockwise. If it’s stuck, wrap it with a cloth and use pliers gently to avoid scratching the finish. Once removed, you’ll likely see white or greenish mineral deposits clogging the screen. Rinse it under running water, then soak it in equal parts white vinegar and water for 30 minutes. Use an old toothbrush to scrub away stubborn buildup, paying attention to the tiny holes in the screen.
If cleaning doesn’t restore pressure, the aerator might be too damaged, replacements cost just a few dollars at any hardware store. Bring the old one to ensure you get the right thread size.
Still have weak flow after replacing the aerator? Check the supply valves under your sink. Make sure they’re fully open by turning them counterclockwise until they stop. If one valve seems restricted or corroded, it may need replacement, a job that’s still manageable but requires shutting off your home’s main water supply first.
Repairing or Replacing the Sprayer
Start by testing whether the problem is with the sprayer head or something deeper in the system. Turn on the faucet and press the sprayer trigger. If water flows from the spout instead of the sprayer, you’ve got a diverter valve issue. If the sprayer dribbles weakly or leaks from the hose, that’s typically hose or head damage.
For a clogged sprayer head, unscrew it from the hose and soak it in equal parts white vinegar and water for 30 minutes. Use a toothpick to clear mineral deposits from the spray holes, rinse thoroughly, and reattach.
If the hose is cracked or the sprayer won’t build pressure after cleaning, you’ll need a replacement hose assembly. Shut off the water supply and disconnect the hose from under the sink. Most attach with a simple threaded connection or quick-connect fitting. Take the old hose to the hardware store to match the connection type.
A faulty diverter valve requires accessing the faucet body to replace the small valve that redirects water flow. This repair is trickier and often means it’s time to consider replacing the entire faucet if it’s already several years old.
When to Call a Professional
Most kitchen faucet repairs are DIY-friendly, but some situations call for professional expertise. If you discover extensive corrosion that’s made parts brittle or impossible to remove, a plumber has specialized tools to handle the job without damaging your sink or countertop. A cracked faucet body means replacement rather than repair, and proper installation prevents future leaks. If your faucet uses a complex cartridge system you can’t identify, or if your DIY fix didn’t resolve the problem after following the steps carefully, it’s time to bring in help. Water damage gets expensive fast, so there’s no shame in calling a pro when you’re stuck. Use our Find a Plumber feature to connect with licensed professionals in your area who can diagnose tricky issues and ensure the repair lasts.
Real Stories: Kitchen Faucet Repairs From Our Community
Our community has learned valuable lessons tackling kitchen faucet repairs, and their stories might sound familiar if you’re facing similar challenges.
Marcus from Portland thought he’d conquered his dripping faucet after replacing the cartridge, only to have it leak again two days later. “I was so frustrated I almost called a plumber,” he admits. “Then I remembered the plumber’s grease packet I’d tossed aside.” He disassembled everything again, applied the silicone grease to the O-rings this time, and hasn’t had a drip since. His takeaway? Reading the full instructions before starting saves you from doing the job twice.
Jennifer in Austin learned about the importance of taking photos during her repair. She confidently took apart her two-handle faucet to replace washers, but when it came time to reassemble, she couldn’t remember the exact order of the parts. “I had springs, seats, stems, and screws spread across my counter with no clue what went where.” After an hour of trial and error, she got it right. Now she photographs each step of any disassembly project, and she keeps the manual saved on her phone.
Then there’s Robert, who bought what he was certain was the correct replacement cartridge based on the faucet brand. When it didn’t fit, he discovered his 15-year-old model had been discontinued and required a different part number. “The hardware store guy helped me cross-reference it,” Robert explains. “Turns out the manufacturer changed designs halfway through production that year.” He ordered the right part online using the actual model number stamped on the faucet body rather than just the brand name.
These experiences remind us that repair projects rarely go exactly as planned, and that’s perfectly normal.
Preventing Future Faucet Problems
A few minutes of regular maintenance beats emergency repair every time. Most kitchen faucet failures result from neglect rather than defects, and simple habits can extend your faucet’s life by years.
Start with the aerator. Unscrew it every three months and soak it in vinegar overnight to dissolve mineral deposits that choke water flow. Rinse thoroughly before reinstalling. This five-minute task prevents 80% of low-pressure complaints. In areas with hard water, consider well water filtration or water purification systems to reduce buildup before it reaches your fixtures. If you decide to install water filters an under-sink water filter works particularly well for protecting kitchen plumbing.
| Maintenance Task | Frequency | Time Required |
|---|---|---|
| Clean aerator | Quarterly | 5 minutes |
| Check under-sink connections | Twice yearly | 10 minutes |
| Lubricate moving parts | Annually | 15 minutes |
| Inspect sprayer hose | Annually | 5 minutes |
Treat your faucet handles gently. Cranking them hard doesn’t improve performance and damages internal seals. Turn just until water flows or stops. Address drips immediately rather than ignoring them. That slow drip wastes water and signals a problem that’ll worsen.
Twice yearly, open the cabinet and inspect supply line connections with a flashlight. Feel for dampness and look for corrosion or mineral crusting around fittings. Catching small leaks early prevents cabinet damage and expensive repairs later.
Your Kitchen Faucet Questions Answered
Looking up your faucet model might feel like detective work, but a few quick checks usually solve the mystery. Check under the sink for a manufacturer’s label on the supply lines or faucet body, look for branding on the handle or base, or take a clear photo of your faucet and search online for “kitchen faucet” plus any visible markings. If you still can’t identify it, most hardware stores have staff who can match your faucet to common types based on photos.
Can I mix brands when replacing parts?
Stick with the same brand whenever possible. While some generic parts like O-rings might fit, cartridges and valve assemblies are usually brand-specific and won’t work properly if mismatched, leading to leaks or poor performance.
How long should a kitchen faucet last?
A quality faucet typically lasts 15-20 years with proper maintenance, though you’ll likely replace washers, cartridges, or O-rings several times during that lifespan. Budget models might need replacement after 8-10 years.
What if I stripped a screw during disassembly?
Try a rubber band between the screwdriver and screw head for extra grip, use a screw extractor set from the hardware store, or carefully apply penetrating oil and let it sit for 30 minutes before trying again. If nothing works, you might need to replace the entire handle assembly.
Are expensive faucets worth it for easier repairs?
Higher-end faucets often use ceramic disc cartridges that last longer and are easier to replace than compression valve systems, but they’re not immune to problems. The real value is in build quality and better warranty coverage, not necessarily simpler repairs.
Do I really need to shut off the water before starting repairs?
Always shut off the water supply valves under the sink before any repair work. Skipping this step turns a manageable fix into a flood emergency, and it only takes 30 seconds to locate and turn the valves.
What’s the difference between compression, cartridge, and ceramic disc faucets?
Compression faucets have separate hot and cold handles with rubber washers that compress to stop water flow. Cartridge faucets use a movable stem cartridge, while ceramic disc faucets have two ceramic plates that slide across each other, requiring the least maintenance of the three types.
Don’t worry if you make a wrong diagnosis initially. Many DIYers start by replacing one part, only to discover the real culprit was something else entirely. That’s normal, and each attempt teaches you more about how your faucet works. Keep your old parts until you’ve confirmed the new ones solved the problem, and take photos before disassembly so you have a reference for reassembly. The learning curve is part of the process, and you’re building skills that transfer to countless other home repairs.
Quick Reference: Kitchen Faucet Repair at a Glance
Here’s your quick diagnostic guide to get straight to the solution:
Dripping spout when faucet is off → Worn O-rings, washers, or cartridge → Replace the worn component (usually takes 30-45 minutes)
Water pooling around faucet base → Loose mounting nut or failed O-rings at base → Tighten connections or replace base seals from underneath sink
Weak water flow or sputtering → Clogged aerator with mineral deposits → Unscrew aerator, soak in vinegar, scrub clean, reinstall (10-minute fix)
Handle is loose or wobbly → Set screw worked loose → Tighten the small screw under decorative cap with Allen wrench
Sprayer won’t switch modes or has weak spray → Blocked diverter valve or clogged sprayer head → Clean diverter or soak sprayer in vinegar solution
Squealing or screeching when turning on → Worn washer creating vibration → Replace washer inside handle assembly
Can’t control temperature properly → Failed cartridge in single-handle models → Replace entire cartridge unit (moderate difficulty)
Constant drip from sprayer → Worn sprayer hose or damaged trigger → Replace sprayer hose assembly
For any symptom, start by shutting off the water supply valves under your sink before disassembly. Most repairs need just an adjustable wrench, screwdrivers, and replacement parts from your local hardware store. If you’ve tried the fix and the problem persists, that’s when calling a plumber makes sense.
You’ve got this. Most kitchen faucet repairs take less than an hour, and you already have the knowledge you need to handle the most common problems. Whether you’re tightening a loose base, replacing a worn cartridge, or cleaning a clogged aerator, each repair builds your confidence and saves you the cost of a service call.
The best part? These same skills transfer directly to bathroom faucets, outdoor spigots, and other plumbing fixes around your home. What feels intimidating the first time becomes routine the second.
We’d love to hear how your repair went. Share your story, your challenges, or your victories with our community. Your experience might be exactly what another homeowner needs to hear when they’re standing in front of their own dripping faucet, wondering if they can handle it. Spoiler: they can, and so can you.
If you run into something unexpected or just want a second opinion before you start, use our Ask a Plumber feature. Sometimes a quick question prevents a long headache.
Now grab those tools and fix that faucet. Your kitchen is waiting.