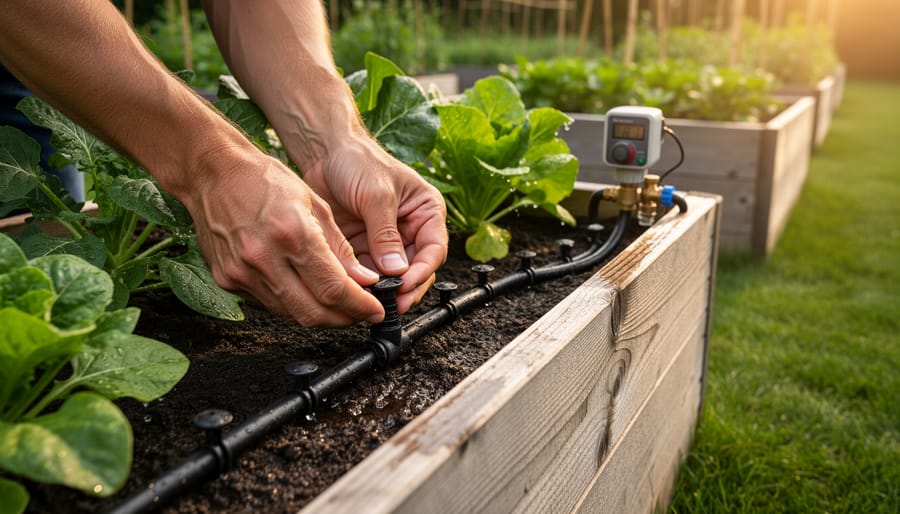
Installing your own garden irrigation system transforms time-consuming daily watering into an automated process that delivers consistent moisture exactly where your plants need it. Whether you’re managing a small vegetable patch or an expansive lawn, a DIY irrigation setup costs 60-70% less than professional installation while giving you complete control over your garden’s watering schedule.
The process breaks down into manageable steps that any homeowner can accomplish over a weekend. Start by mapping your garden zones based on sun exposure and plant water requirements, then calculate your water pressure and flow rate using a simple bucket test. Choose between drip irrigation for garden beds and flowers or sprinkler systems for lawns, understanding that each gallon per minute from your outdoor faucet covers approximately 200 square feet with drip lines or 100 square feet with spray heads.
Purchase components from home improvement stores where staff can help you select the right tubing diameter, emitters, and timer controllers for your specific layout. Most systems connect directly to your existing outdoor faucet without any pipe cutting or permanent modifications to your home’s plumbing.
Real success comes from testing your system before burying lines and adjusting coverage patterns while everything remains visible. Sarah from Portland installed her backyard drip system in six hours, reducing her summer water bill by $45 monthly while her tomatoes thrived with consistent moisture. The key advantage of DIY installation is the ability to expand sections gradually as your gardening ambitions grow, making corrections simple and affordable.
Why Your Garden Needs More Than Just a Hose
We’ve all been there – standing in the yard with a hose in hand, wondering if you’ve watered enough, then realizing you completely forgot about that patch near the fence. Again. Manual watering seems simple enough, but let’s be honest: it’s eating up your evenings and weekends, and your water bill suggests you’re somehow irrigating a small farm rather than a suburban garden.
Sarah from Portland shared her story with us: “I’d spend 30 minutes every evening dragging the hose around, but my tomatoes near the house were drowning while the flowers on the other side looked like they’d given up on life. My teenager kept leaving the sprinkler running overnight, and our water bill jumped $80 in one month.”
Sound familiar? The reality is that manual watering creates more problems than it solves. You’re either overwatering some areas (hello, mosquito breeding ground and water waste) or completely missing spots until plants start looking crispy. And that “quick watering” before work? It rarely covers everything properly, leaving you guilt-tripping yourself all day about your thirsty petunias.
Here’s where proper irrigation plumbing becomes your garden’s best friend. A well-designed DIY system delivers the right amount of water exactly where it’s needed, on a schedule that works even when you’re binge-watching your favorite show or away on vacation. It’s not just about convenience – though your reclaimed evenings are a nice bonus. It’s about creating a healthier garden while actually reducing water consumption and lowering those bills.
The good news? Installing a basic irrigation system isn’t as complicated as it sounds, and you definitely don’t need a plumbing degree to pull it off.
Understanding the Plumbing Behind Garden Irrigation
The Water Source Connection
Connecting your irrigation system to your home’s water supply is easier than you might think, though it does require a few essential components for safety and performance. If you’re new to working with water lines, brushing up on home plumbing basics will help build your confidence before starting.
Most DIYers tap into an outdoor spigot or hose bib, which is the simplest connection point. However, you’ll need three important components: a backflow preventer, a pressure regulator, and appropriate connectors.
The backflow preventer is your safety hero. It stops irrigation water (which may contain fertilizers or pesticides) from flowing backward into your home’s drinking water supply. Think of it as a one-way valve protecting your family’s health. Most municipalities actually require them, so it’s not optional.
The pressure regulator deserves equal attention. Home water pressure typically runs 50-80 PSI, but drip irrigation systems work best at 20-30 PSI. Without regulation, you’ll get burst lines and uneven watering. One homeowner, Sarah from Oregon, learned this the hard way when her first system exploded on day one because she skipped this fifteen-dollar part.
Together, these components create a safe, efficient connection that protects both your drinking water and your investment in the irrigation system.
Pipes, Tubes, and Lines: What’s the Difference?
Choosing the right tubing for your irrigation system doesn’t have to feel overwhelming. Think of it this way: you’re basically picking the highway your water will travel on to reach your plants.
PVC pipes are the sturdy workhorses of irrigation. These rigid white or gray pipes work beautifully for main water lines and areas where you need something permanent underground. They’re incredibly durable and can handle higher water pressure, making them perfect for sprinkler system installations. One homeowner I spoke with compared installing PVC to building with LEGO blocks – once you understand how the pieces connect, it’s surprisingly straightforward.
Polyethylene tubing, often called poly pipe, offers flexibility that PVC can’t match. This black, bendable tubing snakes easily around garden beds and trees without requiring numerous fittings. It’s forgiving for beginners and ideal for above-ground or shallow installations. Think of it as the gentle option that adapts to your garden’s curves.
Drip line is your precision tool for water-efficient gardening. These thin tubes deliver water directly to plant roots through tiny emitters spaced along their length. They’re perfect for vegetable gardens, flower beds, and anywhere you want to minimize water waste while maximizing plant health.
Most DIYers find success combining materials – PVC for main lines, poly pipe for distribution, and drip line at the plants. Your garden’s layout and your comfort level will guide your choice.
Planning Your DIY Irrigation System
Mapping Your Garden’s Water Needs
Before you start digging or shopping for supplies, take a relaxed walk around your yard with a notebook. Think of this as getting to know what each part of your garden really needs.
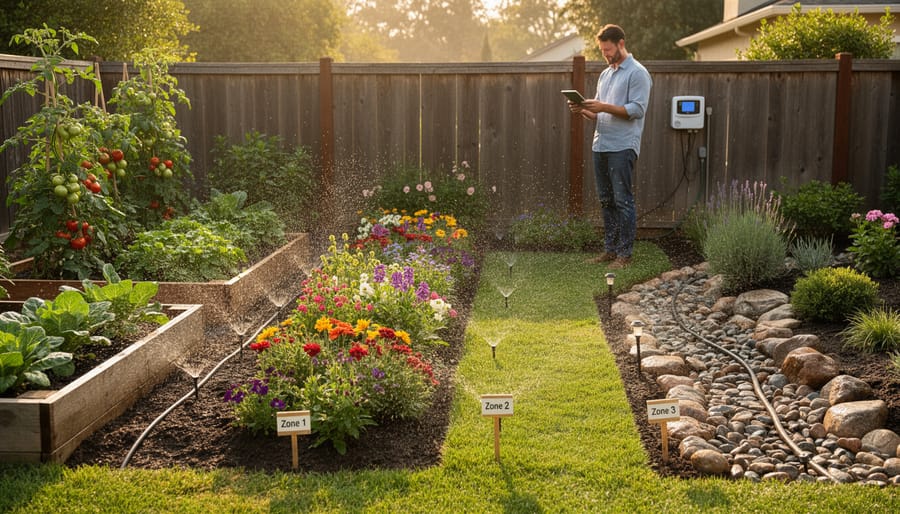
Your vegetable garden is the thirstiest zone, requiring consistent moisture, especially during fruiting. These plants typically need daily watering in hot weather. Meanwhile, established shrubs and trees have deeper root systems and might only need watering once or twice weekly. Your lawn falls somewhere in between, usually doing well with a couple of good soaks per week rather than daily sprinkles.
Sarah, a homeowner from Oregon, learned this the hard way. “I set up my whole system on one timer setting,” she shared. “My herbs were drowning while my tomatoes stayed thirsty!” After mapping her zones separately, she reduced her water bill by 40 percent.
Sketch your yard into zones based on plant types and sun exposure. Sunny spots dry out faster than shaded areas. Note any slopes where water runs off quickly. This simple mapping exercise will guide your material purchases and prevent the frustration of over or under-watering different areas.
Calculating Water Pressure and Flow
Here’s the good news: figuring out your water pressure and flow doesn’t require fancy equipment or an engineering degree. You’ll need just two things from around your house—a bucket and a timer.
Start by testing your water flow. Grab a 5-gallon bucket and place it under an outdoor spigot. Turn the water on full blast and time how long it takes to fill. If it fills in under a minute, you’ve got excellent flow for most irrigation systems. Two to three minutes? You’re still in good shape, though you might need to split your garden into zones.
For water pressure, you can pick up an inexpensive pressure gauge at any hardware store that screws right onto your hose bib. Most home systems run between 40-60 PSI, which works perfectly for drip irrigation and many sprinkler setups.
Here’s something homeowner Maria learned the hard way: “I tried running 12 sprinkler heads at once and got sad little dribbles everywhere.” Don’t worry if you make similar miscalculations—they’re incredibly common and totally fixable. You’ll simply adjust by creating separate watering zones or switching to lower-flow emitters. Think of it as fine-tuning rather than failing. Your plants certainly won’t hold it against you.
Choosing Between Drip, Sprinkler, or Soaker Systems
Each system shines in different situations, and your garden will guide you toward the right choice. Drip irrigation works beautifully for vegetable gardens and flower beds where you need targeted watering at the root level. It conserves water remarkably well and costs less to run, though it requires more planning upfront. Sarah from Portland switched to drip lines for her raised beds and cut her water bill by half while her tomatoes thrived.
Sprinkler systems excel in lawns and larger open areas where you want even coverage. They’re familiar and easier to visualize for beginners, but they use more water and can encourage shallow roots. The installation is straightforward, making them popular for first-time DIYers.
Soaker hoses offer a middle ground, perfect for garden rows and hedges. They’re incredibly affordable and flexible to move around as your garden evolves. However, water distribution can be uneven on sloped terrain. Many gardeners combine systems, using drip lines for vegetables and sprinklers for grass.
Essential Tools and Materials You’ll Actually Need
Let me walk you through what you’ll actually need for your DIY irrigation project without breaking the bank. I’ve seen homeowners get overwhelmed by fancy equipment catalogs, but trust me, you can create an effective system with these basics.
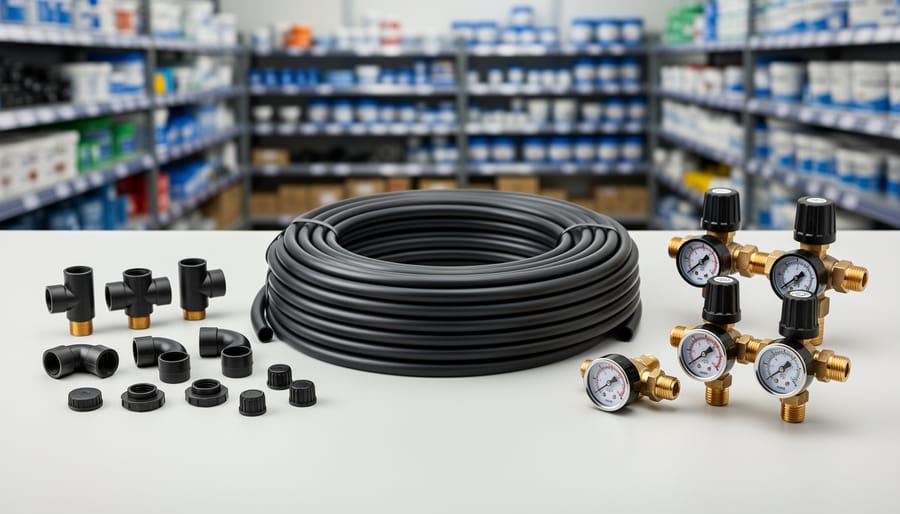
Start with your mainline tubing, typically half-inch polyethylene tubing available at any hardware store. This flexible black tubing runs from your water source to your garden beds. You’ll need drip irrigation tubing too, the quarter-inch variety works perfectly for most home gardens. Budget around $25-40 for tubing depending on your garden size.
Next up are emitters or drippers, those small devices that actually water your plants. You can choose between individual drip emitters (great for precise watering) or soaker hoses (easier for beginners). Expect to spend $15-30 here. Sarah from Portland shared how she started with basic soaker hoses in her vegetable garden and gradually added drip emitters as she got more confident, proving you don’t need everything at once.
Don’t forget connectors and fittings. Grab a variety pack of tees, elbows, and straight connectors for about $10-15. These let you customize your layout without calling a professional for every adjustment. Add a pressure regulator (around $8-12) since most drip systems work best at 25-30 PSI, much lower than typical household water pressure.
You’ll need a timer or controller, ranging from $20 for basic battery-operated models to $100 for smart WiFi versions. Start simple, you can always upgrade later.
Budget-friendly alternative? Skip the fancy connectors initially and use basic hose attachments you might already own. Many garden centers sell starter kits for $50-75 that include most essentials, perfect if you’re testing the waters.
Total realistic budget: $100-250 depending on garden size and complexity. Most items are available at Home Depot, Lowe’s, or online retailers with easy returns if you overbuy.
Step-by-Step Installation Process
Connecting to Your Home’s Plumbing System
The good news? Connecting your irrigation system to your home’s water supply is simpler than most people expect. Most DIY garden irrigation systems connect directly to an existing outdoor faucet, requiring no pipe cutting or permanent modifications to your outdoor plumbing connections.
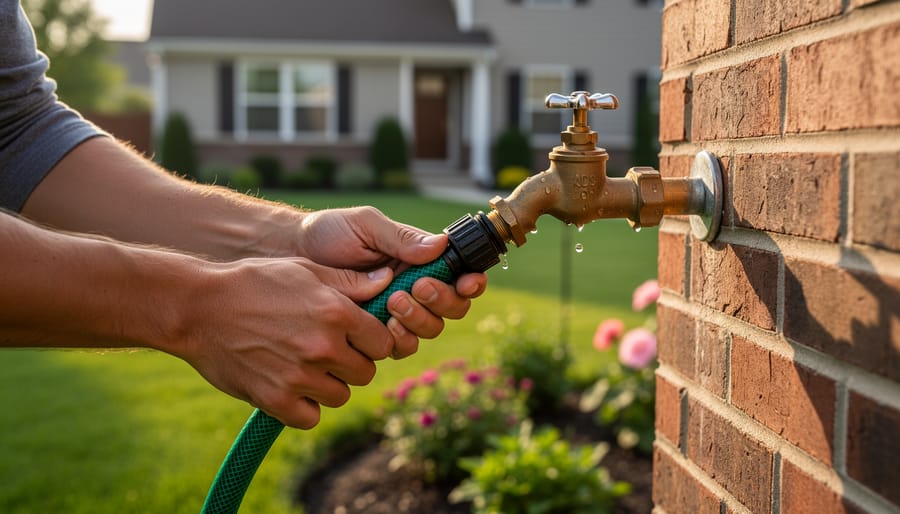
Start by choosing a connection point. Your outdoor spigot is ideal because it’s already designed for hose attachments. You’ll need a backflow preventer, which is essential and often required by local codes. This small brass device prevents irrigation water from flowing backward into your drinking water supply. Simply screw it onto your faucet, then attach your system’s main supply line to the backflow preventer.
For basic drip irrigation or soaker hose systems, this straightforward faucet connection is perfectly adequate. You can complete it in minutes with no special tools beyond an adjustable wrench for tightening connections.
However, consider calling a professional plumber if you’re installing an automated system with multiple zones requiring a direct connection to your main water line, if you need to tap into underground pipes, or if you’re installing an irrigation-specific valve inside your home. One homeowner, Sarah from Portland, shared that she confidently installed her drip system herself but wisely hired a plumber for the backflow testing and certification, which saved her potential code violation headaches.
Remember, there’s no shame in calling for help. Many plumbers appreciate when DIYers handle the simple connections themselves, then bring in professionals for the technical work. This hybrid approach saves money while ensuring everything meets safety standards.
Laying Out Your Mainline and Zones
Now comes the fun part—actually laying out your irrigation system! Start by laying your mainline pipe along the planned route before digging. This lets you visualize the layout and make adjustments before committing to trenches.
When you’re ready to dig, aim for trenches about 6-8 inches deep for basic systems (deeper in cold climates to prevent freeze damage). Pro tip from longtime DIYer Maria: “I used spray paint to mark my trench lines first. It saved me from accidentally digging through my prized rose bushes!”
As you lay pipes, avoid sharp bends that can restrict water flow. Instead, use elbow fittings for turns. Keep pipes slightly loose in the trench initially—soil settling might pull tight connections apart.
Here’s a common mistake to dodge: assuming all connections are watertight without testing. Before backfilling any trench, turn on your water supply and check each connection for leaks. It’s much easier to tighten a fitting now than after covering everything with soil.
For above-ground sections, secure pipes with stakes or clips to prevent movement. Sunlight degrades plastic pipes over time, so consider burying exposed sections or using UV-resistant materials.
Test each zone individually as you complete it. This step-by-step approach helps you catch problems early. If a zone isn’t getting adequate pressure, you might need to adjust your layout or reduce the number of emitters on that line.
Remember, this isn’t a race. Taking time to test connections as you go prevents frustrating do-overs later.
Installing Emitters, Sprinklers, or Soaker Hoses
Now comes the exciting part – connecting your emitters, sprinklers, or soaker hoses to bring your system to life! This is where all your planning pays off.
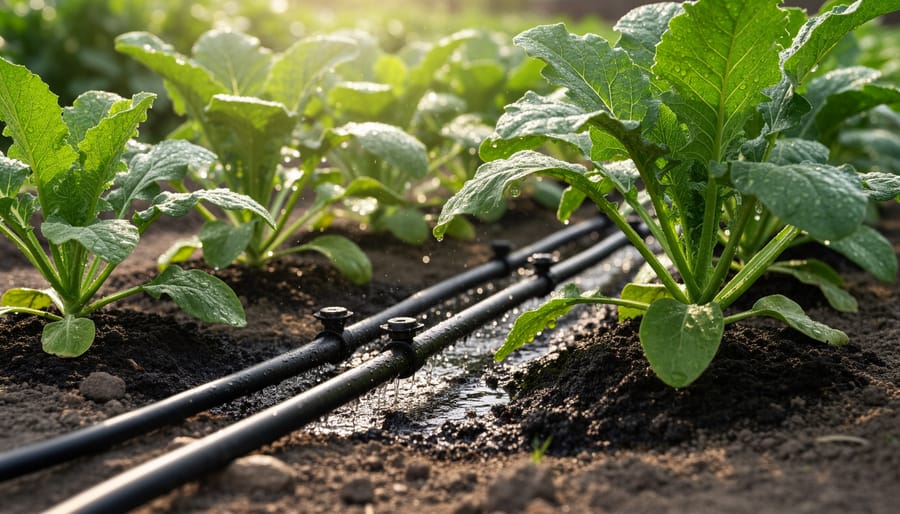
Start by punching holes in your mainline tubing using a hole punch tool designed for drip irrigation. These create clean, proper-sized openings that help prevent leaks. For emitters, simply push them firmly into the holes until you feel them seat securely. If you’re using micro-sprinklers, attach them to small stakes first, then connect to the tubing – this keeps spray patterns consistent.
Soaker hoses are wonderfully straightforward. Connect them to your supply line using barbed fittings and hose clamps. Make sure connections are hand-tight, then give them a quarter turn more with pliers, but don’t overtighten or you’ll crack the plastic.
Here’s a tip from Sarah, a homeowner in Oregon who installed her system last spring: “I turned on the water slowly the first time and watched each connection. Catching a loose fitting early saved me from a muddy mess later!”
Common troubleshooting fixes are simple. If you notice leaks at connection points, turn off the water and reseat the fitting. For uneven pressure or some emitters not dripping, check for kinks in your tubing or clogged emitters – often a quick flush solves this. Low pressure throughout might mean your filter needs cleaning.
Walk your entire system during the first run, making notes of any adjustments needed. This hands-on check catches issues before they become problems, ensuring your garden gets the even watering it deserves.
Real Stories: DIYers Share Their Irrigation Wins (and Lessons)
You’re not alone in this journey! Let me share some real experiences from fellow DIYers who’ve tackled their own irrigation systems.
Sarah from Oregon learned an important lesson about water pressure the hard way. “I installed everything perfectly, or so I thought,” she laughs. “But when I turned it on, my sprinklers barely sprinkled. Turns out, I needed a pressure regulator because my home’s water pressure was too high for my drip lines.” After adding a simple regulator from the hardware store, her system worked beautifully. The takeaway? Test your water pressure before buying components.
Then there’s Mike, a weekend warrior from Texas, who got creative with his timing. “I work long hours, so I installed my system in stages over three weekends,” he shares. “First weekend was planning and layout, second was digging trenches, third was connecting everything. Breaking it down made it less overwhelming.” Mike’s approach shows you don’t need to complete everything in one marathon session.
Jennifer’s story really resonates with many beginners. She accidentally cross-threaded several fittings during her first attempt. “I was so frustrated! But instead of giving up, I watched some videos, bought replacement fittings for under ten dollars, and tried again. This time, I hand-tightened everything first before using tools.” Her persistence paid off, and now her vegetable garden thrives with consistent watering.
These stories highlight something important: everyone makes mistakes during their first installation. The difference between success and frustration often comes down to patience, willingness to learn, and remembering that most problems have simple, affordable fixes. Your irrigation project is a learning experience, not a test you can fail.
Common Problems and How to Fix Them
Even the best-planned DIY irrigation systems can hit a few bumps along the way, but don’t worry—most issues are surprisingly easy to fix! Let’s walk through the most common problems and get your system back on track.
If you’re experiencing low water pressure, you’re not alone. Sarah from Portland shared how her drip system barely trickled until she discovered a partially closed valve near her main line. Start by checking all your valves are fully open, then inspect for kinked tubing or clogged filters. Sometimes water pressure issues stem from your home’s main supply, especially if you’re running sprinklers while doing laundry or dishes. Try staggering your watering schedule to avoid competing demands.
Leaks are another frequent visitor in DIY irrigation. That pooling water around connections usually means fittings weren’t pushed together completely or you’re missing a rubber washer. Simply drain the line, reseat the connection firmly, and check that all components are compatible—mixing brands sometimes causes seal problems.
Clogged emitters happen to everyone, particularly in areas with hard water. Kevin, a retired plumber from Arizona, suggests soaking stubborn emitters in vinegar overnight to dissolve mineral buildup. For prevention, install a quality filter at your system’s beginning and flush lines seasonally.
Uneven watering often signals improper zone planning or too many emitters on one line. Walk your garden during operation—you’ll quickly spot dry patches or oversaturated areas. The fix might be as simple as adding another drip line or splitting your system into separate zones.
Remember, troubleshooting is part of the learning process. Each challenge you solve makes you more confident for next time!
When to Call a Professional Plumber
While DIY installation can handle most garden irrigation projects, some situations genuinely benefit from professional expertise. If you’re connecting to your home’s main water line, it’s worth calling in help. These connections require permits in many areas and involve shutting off your household water supply. One homeowner, Sarah from Texas, shared how her plumber completed the main line tap in under an hour, preventing potential flooding issues she hadn’t anticipated.
Complex pressure problems beyond basic regulator adjustments often signal underlying issues that professionals can diagnose quickly. They have specialized equipment to test flow rates and identify blockages you might miss.
Backflow prevention is another area where professionals shine. Most municipalities require certified backflow devices to protect your drinking water from contamination. Installation and annual testing must be done by licensed technicians in many jurisdictions. Trying to skip this step can result in fines and potential health hazards.
If you’re feeling overwhelmed or your project hits unexpected complications, don’t hesitate to find a qualified plumber in your area. Professional help isn’t admitting defeat; it’s making a smart investment in your home’s long-term functionality and safety.
Maintenance Tips to Keep Your System Running
Good news: keeping your DIY irrigation system in top shape doesn’t require a plumbing degree or hours of work. A little regular attention goes a long way toward preventing costly repairs and frustrating breakdowns down the road.
Start each spring by turning on your system gradually. Check every sprinkler head and drip emitter for clogs or damage during that first run. Sarah from Portland learned this the hard way when she skipped her spring inspection and discovered three broken heads had been watering her fence all season instead of her tomatoes. A simple 20-minute walkthrough would have saved her water bill headache.
Throughout the growing season, adjust your timer monthly as weather changes. What works in cool May won’t suit July’s heat. Clean filters in drip systems every few weeks to maintain steady water flow.
Before winter hits, drain your system completely to prevent freeze damage. In cold climates, blow out lines with compressed air or use your system’s drain valves. This single task prevents most winter-related problems and extends your system’s lifespan by years.
Twice yearly, inspect connections for leaks and tighten as needed. Check valve boxes for standing water, which signals drainage issues. These quick checks catch small problems before they become expensive emergencies.
Think of irrigation maintenance like seasonal plumbing care for your home: consistent small efforts prevent major issues. Most homeowners spend under an hour per season on these tasks, saving hundreds in repairs and wasted water while keeping their gardens thriving beautifully.
You’ve done it! You’ve learned how to create your own garden irrigation system, and that’s something to be genuinely proud of. Think about what you’ve accomplished: you’re going to save water, cut down on your utility bills, and give your plants the consistent care they need to thrive. No more rushing home to water before dinner or worrying about your garden while you’re on vacation. You’ve given yourself the gift of time and your plants the gift of healthier growth.
Now’s the perfect time to start sketching out your plan. Measure your garden beds, think about what grows where, and decide which irrigation method makes the most sense for your space. Remember, you don’t have to tackle everything at once. Start with one area and expand as you gain confidence.
We’d love to hear how your project goes! Share your story on our website so other DIY enthusiasts can learn from your experience. Whether you discover a clever shortcut or run into an unexpected challenge, your insights help build our community’s knowledge. And if you hit a snag that needs professional expertise, don’t hesitate to explore our resources for finding qualified help. You’ve got this, and we’re here to support you every step of the way.