Installing a water filter in your home is a straightforward weekend project that most homeowners can complete in 30 minutes to two hours, depending on which type of system you choose. The process involves mounting the filter unit, connecting it to your water supply line, and running a few test cycles to ensure proper flow and seal integrity. You won’t need specialized plumbing certification for common residential filters like under-sink, faucet-mounted, or countertop models, though whole-house systems typically require professional installation due to code requirements and the complexity of main line connections.
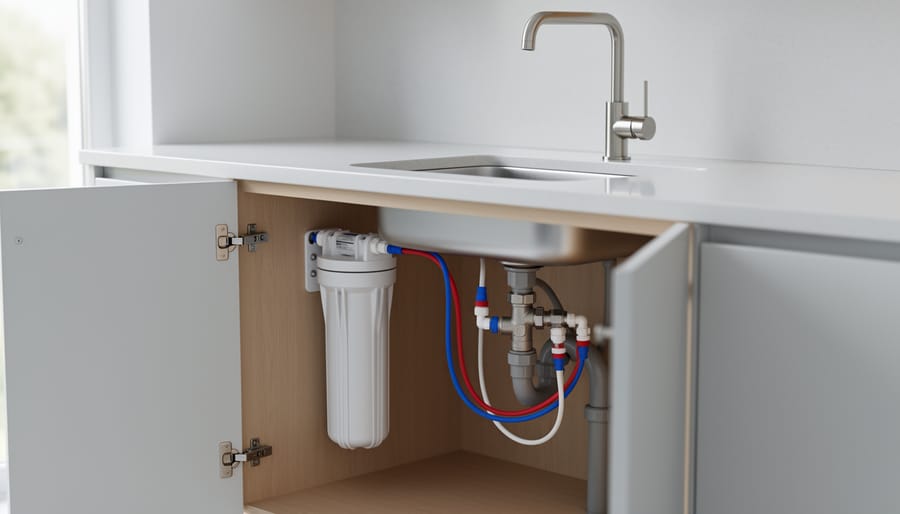
Clean drinking water has become a top priority for families across the country, and modern filter systems have evolved to meet that need with user-friendly designs that clip, twist, or thread into place without soldering or major pipe modifications. Sarah, a first-time homeowner from Oregon, told us she felt intimidated by the prospect of cutting into her kitchen plumbing but discovered her under-sink carbon filter came with color-coded tubes and push-to-connect fittings that made installation surprisingly simple.
The right approach depends entirely on your housing setup, water quality concerns, and how much filtration capacity you need. A college student in a rental might thrive with a countertop pitcher system, while a growing family dealing with sediment issues could benefit from a dedicated under-sink reverse osmosis unit. This guide walks you through each installation type with clear instructions, helps you identify when to call a licensed plumber, and shows you exactly how to verify your new system is working correctly.
Choosing the Right Water Filter for Your Installation
Before you start turning wrenches or drilling holes, you need to identify exactly which type of water filter you’re working with. The installation process varies dramatically between systems, and starting with the wrong instructions is a fast track to frustration.
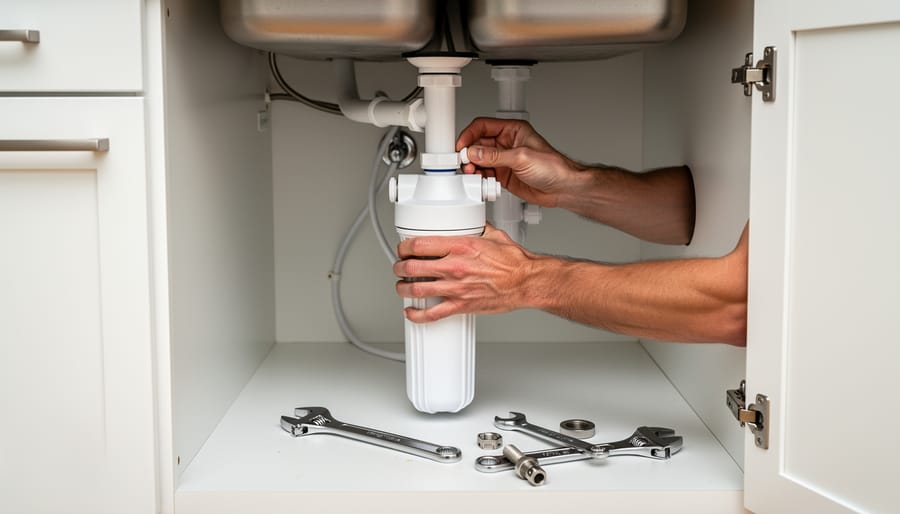
Under-sink filters live in your cabinet and connect to your cold water line. They’re the most popular choice for permanent, high-capacity filtration. Installation involves mounting a bracket, connecting inlet and outlet tubes, and often installing a dedicated faucet on your countertop. Expect this to take 1-2 hours if you’re handy. These are among the best home purification systems for balancing capacity with convenience.
Faucet-mounted filters attach directly to your existing kitchen faucet. Installation is genuinely simple: remove the aerator, screw on the adapter, click the filter unit into place. No tools required beyond what comes in the box, and you’re done in five minutes. These work great for renters or anyone who wants filtered water without modifications.
Countertop filters sit beside your sink and connect via a diverter valve that replaces your faucet aerator. Installation takes about 15 minutes and requires no permanent changes to your plumbing. You’ll switch between filtered and unfiltered water using a valve on the diverter.
Whole-house filters treat all the water entering your home at the main supply line. Installation involves cutting into your main water line, dealing with pressure regulators, and ensuring code compliance. This is professional territory unless you’re an experienced DIYer with plumbing knowledge.
Pitcher filters need zero installation. Fill, wait, pour. We won’t cover these in the installation steps because there’s nothing to install, but they’re worth mentioning as the ultimate no-commitment option.
What You’ll Need: Tools and Materials
Before you start any installation, gathering the right tools makes the process smoother and helps you avoid mid-project trips to the hardware store. The good news is that most water filter kits come with the specific components you need, so you won’t be starting from scratch.
For nearly all installations, you’ll want a bucket or towel handy to catch water when you disconnect lines. Most filters also require an adjustable wrench to tighten connections, and Teflon tape helps create watertight seals on threaded fittings. A screwdriver set (both Phillips and flathead) covers mounting brackets and some compression fittings. Beyond these basics, what you need depends entirely on which type of filter you’re installing.
- Faucet-mounted filters: Usually require no tools at all; the kit includes everything with hand-tightened connections.
- Countertop filters: May need pliers to remove your existing faucet aerator, plus the diverter valve included in the package.
- Under-sink filters: Adjustable wrench, Teflon tape, bucket, drill with hole saw bit (only if installing a dedicated faucet), and the mounting hardware that comes with your filter system.
- Whole-house filters: Pipe cutter or hacksaw, soldering equipment or compression fittings (depending on your plumbing type), mounting brackets, and professional-grade wrenches; most homeowners hire a plumber for these.
Check your filter’s instruction manual before you buy anything extra. Many manufacturers include proprietary wrenches or special adapters designed specifically for their systems. If you’re installing an under-sink system with a dedicated faucet, make sure you have the right size hole saw for your countertop material. Granite and quartz require different drill bits than laminate or wood.
One often-overlooked item is a flashlight or headlamp. Under-sink spaces are dark and cramped, and you’ll need both hands free to work. A towel or knee pad also makes the experience more comfortable since you’ll be kneeling or lying on your back to reach those connections.
Safety First: What to Check Before You Start
Before you pick up a wrench or open any filter packaging, take ten minutes to prepare properly. A little upfront checking can save you from flooded cabinets, stripped fittings, or discovering halfway through installation that you need parts you don’t have.
Start by locating your water shut-off valve. For under-sink, countertop, and faucet-mounted filters, you’ll typically use the shut-off valve directly under the sink where the cold water line connects. Turn it clockwise until it stops, then open the faucet to release any remaining pressure in the line. Keep a bucket and some old towels handy because even after shutting off the valve, water will drain from the lines when you disconnect them.
While you have the cabinet open, inspect the existing plumbing. Look for signs of corrosion, existing slow leaks, or damage to the shut-off valve itself. If the valve is stuck, corroded, or hasn’t been turned in years, this is the time to replace it, not during filter installation. Check that you have adequate space under the sink for your filter unit and that the cold water line has a standard threaded connection.
For whole-house systems or any installation that involves your main water line, check local building codes. Many jurisdictions require permits for whole-house filter installations, and some require licensed plumber installation for code compliance and insurance purposes. A quick call to your local building department can clarify requirements.
Sarah, a homeowner in Portland, shared her close call: she was ready to install an under-sink filter when she noticed the shut-off valve under her sink was weeping water around the stem. Instead of proceeding, she replaced the faulty valve first. “I would have blamed the new filter for the leak,” she said. “Checking everything beforehand saved me a lot of frustration.”
Know when to stop and call a professional. If you discover damaged pipes, need to modify your main water line, lack confidence working with plumbing connections, or find that your installation requires cutting into walls or floors, professional help is the smarter choice.
How to Install an Under-Sink Water Filter
Connecting to an Existing Faucet vs. Installing a Dedicated Tap
When you’re installing an under-sink filter, you’ll face one key decision: connect to your existing faucet or add a dedicated filtered-water tap.
Connecting to your existing faucet is the simpler approach. You’ll install a diverter valve on the cold water line that splits the flow, sending some water through the filter and back to your regular tap. No drilling required, and everything stays hidden under the sink. The downside? You can’t control when water goes through the filter, it’s always on when you use cold water, which shortens filter life if you’re filling pots or washing dishes.
Installing a dedicated tap gives you a separate faucet just for drinking water. You’ll need to drill a hole in your sink or countertop (usually 1.25 inches), mount the new faucet, and connect it to the filter’s outlet line. This setup lets you use filtered water only when you want it, extending filter cartridge life. It also maintains full pressure at your main faucet.
Most under-sink kits include components for both options. Check if your sink has a pre-drilled hole (many have an extra knockout hole covered with a cap) before you commit to the dedicated tap route. Following the under-sink install steps carefully will ensure whichever configuration you choose works properly from the start.
How to Install a Faucet-Mounted Water Filter
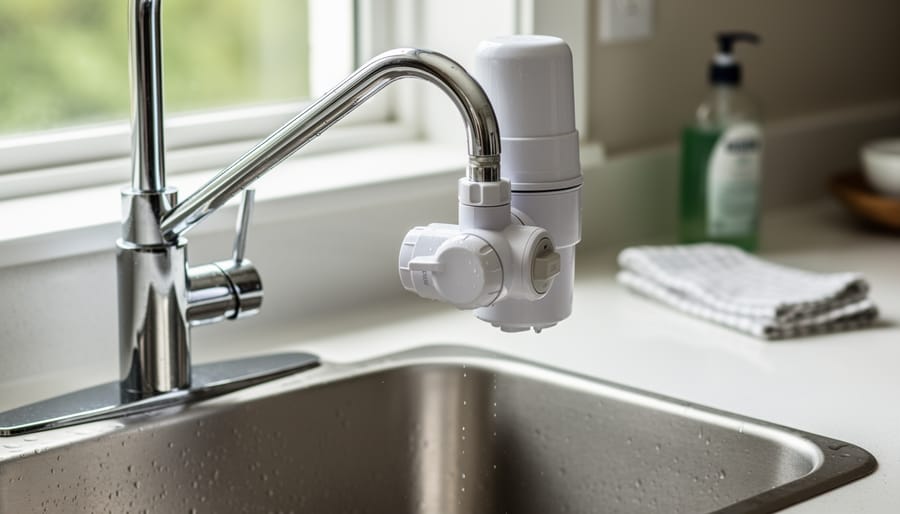
Faucet-mounted filters are the quickest win in home water filtration. If you’ve been putting off improving your drinking water because you think it’ll be complicated, this is your entry point. The entire installation takes about five minutes, and you won’t need to crawl under your sink or call anyone for help.
Here’s how to get it done:
- Unscrew your faucet’s aerator (the screen piece at the tip) by turning it counterclockwise. If it’s stuck, wrap a cloth around it and use pliers gently to avoid scratching the finish.
- Screw the diverter valve onto your faucet threads where the aerator was. Hand-tighten it firmly, but don’t force it, you’re not trying to fuse metal.
- Attach the flexible hose from the filter unit to the diverter valve. You’ll hear or feel a click when it’s secure.
- Turn on your faucet and switch the diverter to “filter” mode. Let water run for two minutes to flush the new filter cartridge.
- Check all connection points for drips while the water runs. Tighten gently if you spot any moisture.
That’s it. You now have filtered water on demand. The beauty of faucet-mounted filters is that they’re completely reversible, perfect for renters or anyone who wants to test the filtered water life before committing to something more permanent like under-sink systems. They’re also a smart companion to well water filtration systems if you want an extra layer of filtration right at the point of use.
Most units include a switch that lets you toggle between filtered and unfiltered water, which saves your filter cartridge when you’re just rinsing dishes. The filter typically lasts two to three months depending on your water quality and usage.
How to Install a Countertop Water Filter
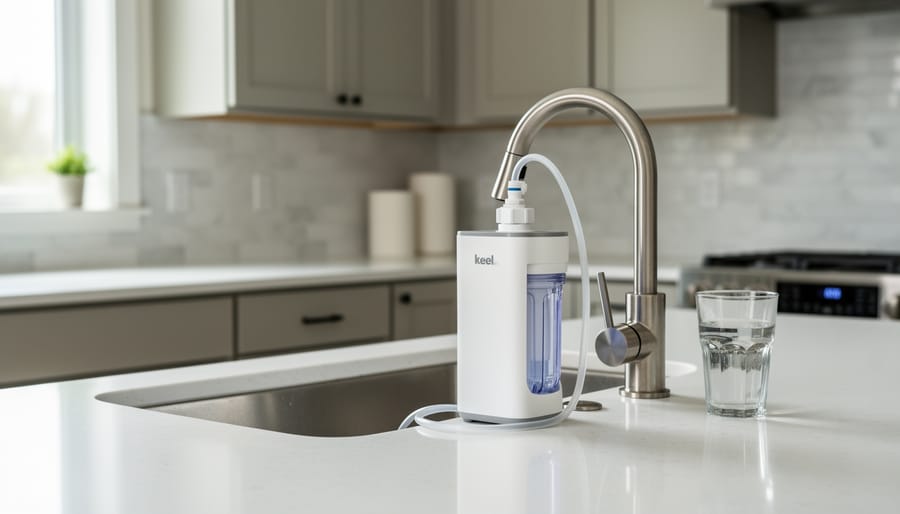
Countertop water filters are perfect if you’re renting or want a no-commitment solution. The whole setup takes about ten minutes, and you won’t drill a single hole or modify your plumbing permanently.
Start by unscrewing your faucet’s aerator (that’s the small screen piece at the tip). Most turn counterclockwise, though some older models may need pliers if they’re stuck. Keep the aerator somewhere safe, you’ll want it if you move.
Now attach the diverter valve that came with your filter. Thread it onto your faucet where the aerator was, making sure it’s snug but not over-tightened. The diverter has a small lever or switch that controls water flow, and it includes a connection point for the filter tube.
Connect the plastic tubing from your countertop unit to the diverter valve. Push it in firmly until you hear or feel a click, it should be secure enough that gentle tugging won’t pull it loose. Some systems use threaded connections instead; just hand-tighten those.
Place your filter unit on the counter near the sink and run water through it for several minutes to flush out any manufacturing residue. You’ll use the diverter switch to choose between sending water through the filter or straight from the tap, handy for filling pots or washing dishes when you don’t need filtered water.
If you’re concerned about contaminants that basic countertop filters miss, upgrading to a system where reverse osmosis can fix more complex water quality issues might be worth considering down the road.
When to Call a Professional: Whole-House and Complex Systems
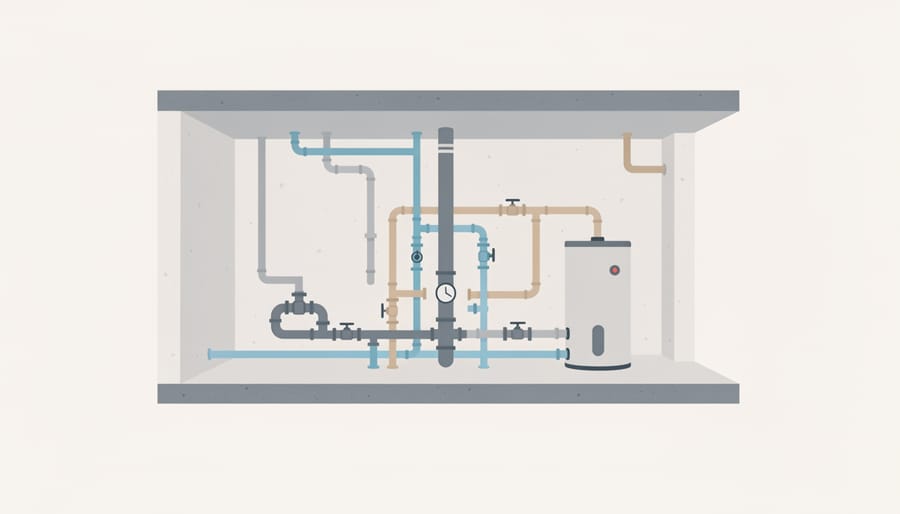
While many filter installations are perfect for a confident DIYer, whole-house water filter systems are a different story. These systems treat all the water entering your home, which means installing them at the main water line before it branches to your fixtures. That’s where professional help becomes not just helpful, but genuinely necessary for most homeowners.
The complexity starts with location and access. Whole-house filters must be installed on the main supply line, typically right after the water meter or where the line enters your home. In many properties, this spot sits in a cramped crawl space, a buried utility box, or behind finished walls. Beyond the awkward positioning, you need to cut into the main line, install shutoff valves, mount a substantial filter housing that can handle high flow rates, and ensure every connection is absolutely leak-proof under pressure. One mistake here floods your entire home, not just the area under your kitchen sink.
Code compliance adds another layer. Most municipalities require permits for any work on the main water supply, and many mandate specific backflow prevention devices or pressure-regulating valves when you add filtration equipment. A licensed plumber knows these requirements and pulls the necessary permits as part of the job. They also understand pressure dynamics, whole-house filters reduce water pressure slightly, and homes already dealing with low pressure may need a booster pump installed simultaneously.
Professional installation costs typically range from $300 to $1,000 for labor, depending on your location and how accessible your main line is. That sits on top of the filter system itself, which runs $500 to $2,500 depending on capacity and filtration technology. Yes, it’s a significant investment, but consider what’s at stake: a botched whole-house installation can cause water damage costing thousands to repair, while a proper professional job comes with warranty protection and the assurance that everything meets code.
The approach varies by property type. In single-family homes, plumbers usually work at the point where the main line enters through the foundation or at an exterior meter box. They appreciate clear access to that area and enough space around the pipe to work comfortably. In multi-unit buildings or condos, the challenge intensifies, the plumber needs to access your unit’s branch line from the building’s main supply, which might involve coordinating with property management and working in shared utility spaces. Some older buildings have galvanized pipes that complicate installation, while newer construction with PEX or copper makes the job more straightforward.
Finding the right professional matters. Look for licensed plumbers with specific experience in water filtration systems, not just general plumbing. Ask to see photos of previous whole-house filter installations they’ve completed. Check that they’re insured and willing to pull permits. Many water treatment companies employ or contract with plumbers who specialize in these installations, they’re often your best bet because they understand both the plumbing and filtration sides equally well.
Testing Your Installation: How to Know It’s Working Properly
You’ve just finished installing your water filter, and now comes the moment of truth: making sure everything works properly. Start by turning the water supply back on slowly while watching all connection points. You should see water flowing into the filter housing without any drips or sprays.
Run water through the system for the initial flush period recommended in your manual, typically five to ten minutes. Don’t panic if the water looks cloudy or milky at first. This is completely normal and happens because air trapped in the filter cartridge is working its way out. The cloudiness should clear within a few minutes of continuous flow.
Here’s your verification checklist to confirm everything is working correctly:
- Check all connection points for leaks while water is running
- Verify water pressure feels normal at the filtered tap
- Confirm water flows smoothly without sputtering or gurgling
- Look under the sink or around the filter housing for any moisture
- Test both filtered and unfiltered settings if your system has a diverter
After the initial flush, fill a glass and check that the water tastes clean without any plastic or chemical flavour. If you’re installing a filter to address specific water quality issues like hard water (or if you’re considering whether to choose a water softener alongside your filter), you might want to use a home testing kit after 24 hours to confirm the filter is removing what you need it to remove.
Give your installation a final inspection after a few hours of use. Sometimes small leaks only appear once water pressure fully stabilizes in the system.
Troubleshooting Common Installation Problems
Even when you follow the installation steps carefully, you might hit a snag. Most problems have straightforward fixes that don’t require starting over or calling for help.
Leaks at connection points are the most common issue, and they’re usually caused by under-tightening or over-tightening fittings. If you see water dripping from where tubes connect to the filter housing, first shut off the water and remove the connection. Wrap the threads with two or three layers of Teflon tape in a clockwise direction, then reconnect and hand-tighten plus a quarter turn with your wrench. That’s typically all it takes. Over-tightening can actually crack plastic housings or strip threads, so resist the urge to crank down hard.
Sarah from Portland discovered this the hard way when her new under-sink filter started dripping the moment she turned the water back on. She’d tightened everything as hard as she could, worried about leaks. After loosening the connections, adding Teflon tape, and gently re-tightening, the leak stopped completely. “I was ready to return the whole system,” she told us, “but it just needed a lighter touch.”
Low water pressure after installation usually means you forgot to fully open the shutoff valve, or the filter cartridge isn’t seated properly. Check that your supply valve is turned all the way counterclockwise. If pressure is still weak, remove and reseat the filter cartridge, making sure it clicks or locks into place. Some filters need an initial flush period where pressure seems lower until air clears the system.
Filter housing that won’t seal is frustrating but fixable. The O-ring inside the housing cap might be twisted, dry, or missing entirely. Remove the cap, check that the rubber O-ring sits flat in its groove, and apply a thin coat of food-grade silicone lubricant around it. This helps it compress evenly when you screw the housing closed.
What if my faucet threads are stripped and the filter adapter won’t stay on?
You’ll need a universal adapter kit with rubber gaskets that can grip damaged threads, or consider a countertop model that uses a diverter valve instead of threading directly onto the faucet.
My faucet has an unusual shape and the adapter doesn’t fit, now what?
Check if your filter includes multiple adapter sizes in the kit. For pull-down or specialty faucets, a countertop or under-sink system with a dedicated tap works better than a faucet-mounted model.
Why does water spray from the connection when I turn it on?
You’ve got a cross-threaded connection or a missing washer. Shut off the water, disconnect the fitting completely, inspect for a rubber washer inside, and thread it on carefully by hand first before using a wrench.
Stripped threads happen when metal fittings are forced onto plastic components. If you’ve damaged the threads on your filter housing, you might be able to salvage it with a slightly larger rubber washer that creates a seal despite the damage. Otherwise, contact the manufacturer, most will send a replacement housing under warranty rather than make you buy a whole new system.
When connections seem incompatible despite claims of “universal fit,” double-check that you’re using the right adapter from your kit. Most quality filters include three to five different adapters for various faucet styles. If none work, take a photo of your faucet’s aerator threads and contact the manufacturer’s support line before you assume you’ve got the wrong filter entirely.
What Happens Next: Maintenance and Filter Replacement
You’ve finished the hard part, installation is behind you. Now comes the easy stuff: keeping your filter working properly.
Most filter cartridges need replacement every three to six months, depending on your water quality and household usage. Under-sink filters typically last four to six months, while faucet-mounted and pitcher filters run shorter at two to three months. Your system’s manual gives the specific timeline, but your water will tell you too. When flow slows noticeably or taste changes, it’s time for a fresh cartridge.
Mark your calendar right now. Seriously, do it before you forget. Set a phone reminder for two weeks before the replacement date so you have time to order cartridges without running out. Many people stick a small label on the filter housing with the installation date, low-tech but effective.
Replacement itself takes about five minutes for most systems. You’ve already done the tricky part during installation. For under-sink filters, you just shut off the water, unscrew the housing, swap the cartridge, and turn everything back on. Faucet-mounted filters twist off and on. Countertop systems pop open. The threading’s already there, the connections already fit.
Keep spare cartridges on hand. Running out means drinking unfiltered water until Amazon delivers, and that defeats the whole purpose of having a filter. Think of filter replacement like changing your HVAC filters or cleaning your gutters, routine home maintenance that prevents bigger problems down the road.
Installing a water filter doesn’t have to be intimidating. Whether you’ve just attached a simple faucet-mounted unit or tackled an under-sink system, you’ve taken a meaningful step toward better water quality in your home. Most installations really are straightforward DIY projects when you follow the steps carefully and don’t rush the process.
Remember, there’s no shame in calling a professional when the job calls for it. Whole-house systems, complex plumbing modifications, or situations where you’re just not comfortable with the work are all perfectly valid reasons to bring in an expert. Knowing your limits is part of being a smart homeowner.
The hardest part is often just getting started. Once you shut off that water supply and open the first connection, you’ll likely find the process much simpler than you imagined. Take your time, double-check for leaks, and don’t forget that initial flush period before you fill your first glass.
We’d love to hear how your installation went. Did you run into any unexpected challenges? Discover a helpful trick that made the job easier? Share your story with our community. Your experience might be exactly what helps the next reader tackle their own water filter project with confidence.